-------------------------------------------------------------------------------------------------------------------------
This is my new author, post! I find these simply AWESOME! Good thing I have a lot of boring magnets. and a million golden markers! Enjoy her post!
---
_____________________________________________________
Supplies:
- gold Sharpie
- blank black magnets
 | |||
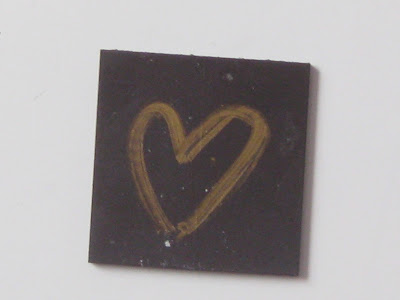
| Step 1: With the gold Sharpie, draw a heart/design/shape on the magnet. |
 | ||
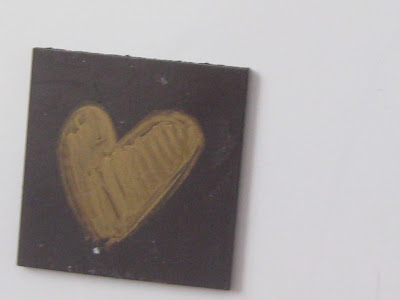
| Step 2: Fill in the heart/shape. |
 | |
| Step 3: Draw small lines on the border of the heart. |
 | ||
| Ta-Da! |
post by: The Coolest Blogger (aka: m&m)
-------------------------------------------------------------------------------------------------------------------------------
Heres a quote!
"WHAT TO DO TODAY?"
Here's how to make a soda can monster! Here are the things you need!
- Scissors
- Paper or duct tape
- Glue on Eyes or permanent marker
- Fluff balls of yawn
- Tape
- Soda can (A normal water bottle will work, it just wont be as nice.)
- Get your duct tape or color paper and wrap it around the soda can. Make sure its on nicely. (If you use duct tape, make sure its as smooth as possible.)
- Get your permanent marker and draw a face for your monster! If you have glue on eyes, or anything else cool feel free to use so!
- ADD HAIR. You can use fluff balls, pipe cleaners, or yawn to make the monsters hair! if its flat on top, you can add a stick on bow or something else creative!
The end.
- -----------------------------------------
"ME WANT BANANA!"
Heres another DIY! Todays is more furniture you can put in the doll house from yesterday!
- Toilet paper roll
- Anything you want for your sofa, couch, or LPS/MLP bed.
- Scissors
- Duct tape (but normal tape is okay. {Kinda} yup.)
Heres what you do.
- Get the scissors and cut the toilet paper in half, so now you have a sofa and a bed.
- Get the duct tape and tape it all around the 2 pieces, but make sure they keep their shape.
- Get what you want in the bed and put it in it.
- Get what you want for the couch and (CAREFULLY) place or glue the things in place for your couch.
NOTE: For the couch, it will be upside down so its more like a couch. You can flatten the couch out on the top so your things can sit on it. Also for the bed, you can get scrap card board and glue it on each side of the bed so it doesn't wobble.
Well, that one was easier then yesterdays! What should I post next?
---------------------------------------------------------------------------------------------------------------
Quote of the day.
"JELLYBEANS!!!!!"
I have made many of these things, and I love them! Of course, this is just how I make them, with little furniture and stuff. This doll house is pretty small, (the one I made,) so it depends on what you use. You can use it for MLP'S or Pet shops though or something. but enough talk, lets get crafting! (Still no pictures yet. When I can get pictures, I will come back and add them.)
- Duct tape. (I hope you have enough to do it!)
- A card board box (Small or large depending on the size.) Oatmeal boxes work well.
- a nail, hook or whatever you want for a door knob for your house.
- toilet paper rolls. (These are for the furniture.)
- Scissors
- Paper
- Color paper. (OPTIONAL, YOU CAN USE THEM FOR DECOR.)
Okie, once you get all of these, heres what you do.
- Get your card board box and tape any rips in it. Only cover the parts that are ripped, or any openings, unless you want that to be the door.
- If you don't have a door yet, get your scissors and cut a door into the box, (the door needs to be big enough for the the doll or whatever)
- once you cut the door out, carefully cut the box so it opens and closes. (This is sorta hard to describe) You know how doll houses open up? Thats what you cut.
- once you get step 3 done, you get your door, and the tape, and tape the sides of the door. You can also do this with windows, or whatever else you want.
- When your finished with everything else, you can paint it, or get the rest of your duct tape and cover it up so its pretty strong.
TADA! HOME MADE DOLL HOUSE! HERES THE INSTRUCTIONS FOR FURNITURE TOO!
Lets make a chair! This kind is a little unstable, so toys that aren't that heavy will work fine.
- A whole bunch of card board scraps will work fine.
- You need glue, or tape that can bend in crazy ways.
- Anything you want to pad your chair, like a cotton ball.
- Get your pieces of card board. You need 1 square pieces, a another square smaller then the first one, and 4 long pieces. (REMEMBER, THIS IS A MLP, LPS, OR SMALL DOLL CHAIR! NOT TOO BIG!)
- get your big square piece and lay it down. On 1 side of it, put glue on one side, and then glue the smaller one onto it, so its facing up. If your using tape, hold the small square on the big square, and tape it around of so its sturdy.
- DO the same things and flip it over, and glue/tape the 4 skinny long pieces on.
TADA! I WILL DO MORE FURNITURE NEXT POST!
---------------------------------------------------------------------------------
"DO YOU LIKE BANANA'S?
"NO."
HELLO! Today, we got an AWESOME craft to do! How to make a duct tape wallet 101. Heres what you need.
---------------------------------------------------------------------------------
Quote for the day. (I call them quotes, but they really aren't they're just questions I ask)
"If you were a superhero, who would you be?"
"SUPER MAN!"
Here are some of my pictures I have drawn.
NOTE : I have a lot of blogs, like Animal Jam Ya, and Cutey Doodles, and a lot I deleted. He-he. And I draw a lot, so if you've seen these before, good for you!
 |
| Fear the magical pet gopher who will eat you if you turn away!! MWHAHA! |
 |
| A MAGICAL BUNNY! |
 |
| A magical cat called, umm, I really dont know. |
 |
| This is my first wolf I drew on Paint. |
 |
| And, this is Kooky my mascot. |
I drew all of these on paint a while ago. But now I don't have Paint anymore so I stopped drawing these on the computer.. Oh well!
Hope I have a more an interesting post tomorrow!
-Happy
------------------------------------------------------------------------------------------------------------------
The quote of the day.. (Blue is me) (Orange is someone else)"DO YOU LIKE BANANA'S?
"NO."
HELLO! Today, we got an AWESOME craft to do! How to make a duct tape wallet 101. Heres what you need.
- LOTS of Duct Tape.
- A trash bin ready by your side.
- Scissors, a knife, or thumbs that can rip duct tape.
Since I cant take pictures, and it would take forever, and videos, I am just typing this down so this might be a little hard to understand and read!
NOTE: Duct tape is hard to rip and cut if you don't have the right supplies. Make sure that you don't get grumpy if you crinkle any up, its hard to do. ALso, you can add pockets to the sides of your wallet when its done.
- Get your Duct tape ready, I prefer colorful patterns to dull grey, but whatever you have works! Get two strips of duct tape of the same size and tape them together, So that each side of the pattern shows. Do the same thing with 2 more pieces of tape. Make sure they're the same size as your first ones though.
- Hold your to pieces of duct tape together exact. Get another a small piece of duct tape and tape it along both sides of the 2 pieces you have. Do the same with the other side of it. Once your done with that, get another piece of duct tape and tape it along the bottom of your to pieces to make your wallet. Your done!
The concept to making the wallet is easy, actually making it though, is another story. If you wanna make a piggy bank though, this is what you have to do. (I call it a duct tape bank { try saying that 5 times fast.} lol)
HOW TO MAKE A DUCT TAPE BANK.
HOW TO MAKE A DUCT TAPE BANK.
- Have a duct tape wallet.
- Get your duct tape wallet, and at both ends of the wallet, fold them together to make a box.
- Tape the sides together, leaving a slit on the top.
AND THATS HOW YOU DO IT. THen you can slide your quarters and change into it. (ANd maybe if your super creative, you can somehow cut a door and lock out of duct tape into it.)
THATS ALL TODAY!
-Happy
------------------------------------------------------------------------------------------------------------------------
And that's all of the posts from my old blogs, unless I 4got something- which I really hope I didn't.
------------------------------------------------------------------------------------------------------------------------
And that's all of the posts from my old blogs, unless I 4got something- which I really hope I didn't.


No comments:
Post a Comment
Get ready for funny and silly replys :D
---RULES---
No swearing,
No rude remarks
No spamming
Any of these broken and comment moderation for a week.